To make cheese from milk and lemon juice, heat the milk, add lemon juice, and let it curdle. Then, strain the curds from the whey and press the curds to form the cheese.
Here’s a simple way for you to make cheese from milk and lemon juice:
Ingredients:
- Get a gallon of whole milk (just make sure it’s not the super-heated kind).
- Grab a quarter cup of fresh lemon juice. If you don’t have that, white vinegar works too.
Equipment:
- Find a big pot, preferably stainless steel or enamel.
- You’ll need a thermometer, cheesecloth, a colander, a slotted spoon, and something to tie the cheesecloth like string or a rubber band.
Instructions:
Step 1: Get Ready
- First things first, make sure all your equipment is super clean. Boil it or use some sanitizer.
Step 2: Heat the Milk
- Pour the milk into the pot and heat it on medium. Keep an eye on the temperature with the thermometer. Get it up to around 185°F (85°C). Stir it every so often to stop it from scalding.
Step 3: Add Lemon Juice
- Once the milk hits that temperature, take it off the heat. Stir in the lemon juice (or vinegar) gently. You should see the milk starting to get lumpy – that’s the curds separating from the liquid whey.
Step 4: Let It Sit
- Leave the milk alone for about 10-15 minutes. This gives those curds time to show up and say hello.
Step 5: Check for Curds
- Stick a knife or spoon into the curds. If they break clean, you’re good to go. If not, let them chill a bit longer.
Step 6: Cut the Curds
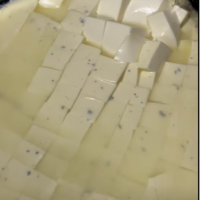
- Grab a knife or a spatula and cut those curds into small pieces. The smaller you go, the firmer your cheese will be.
Step 7: Cook the Curds
- Warm up those curds to 105-110°F (40-43°C), stirring gently. This helps get rid of more whey and makes the cheese firmer.
Step 8: Drain the Whey
- Line your colander with cheesecloth and put it over a bowl or the sink. Pour the curds and whey in, letting the whey drain out.
Step 9: Press and Shape the Cheese
- Tie up the corners of the cheesecloth to make a pouch. Let it hang to drain more or press it down under something heavy to shape the cheese.
Step 10: Let It Set
- Leave your cheese for a few hours or overnight. It’ll get to the consistency you want.
Step 11: Store the Cheese
- Once your cheese is set, pop it in the fridge. Use it right away or let it age for a stronger taste and a firmer texture.
This easy method gives you a mild, fresh cheese. Have fun trying out different ingredients and steps to make it just how you like!

Credit: youtube.com
Unlocking Homemade Cheese Secrets
Making cheese at home can be a rewarding and fun experience. You don’t need to be a professional cheese-maker to create delicious homemade cheese. In this guide, we’ll explore the basics of cheese-making, the importance of using quality ingredients, and how to make cheese from milk and lemon juice.
Understanding The Cheese-making Basics
Making cheese involves a few key fundamental steps that are essential to creating a successful batch. These steps include heating, coagulation, cutting and cooking the curds, draining whey, and pressing the cheese. Each step requires precision and attention to detail to achieve the desired texture and flavor.
Importance Of Quality Ingredients
Using high-quality ingredients is crucial when making cheese at home. Fresh, non-homogenized milk, preferably from a local source, is the foundation of great cheese.
It’s important to use milk that hasn’t been ultra-pasteurized, as this can affect the coagulation process. Additionally, using fresh lemon juice as the coagulant ensures a clean, tangy flavor in the finished cheese.
Cheese Making With Milk And Lemon Juice
Cheese making with milk and lemon juice is a simple and satisfying process that allows you to create your own delicious, homemade cheese. By utilizing the natural acidity of lemon juice, you can curdle the milk to form a creamy and flavorful cheese.
In this article, we will dive into the role of acidity in cheese curdling and explore the benefits of using lemon juice over rennet in the cheese-making process.
The Role Of Acidity In Cheese Curdling
Acidity plays a crucial role in the cheese-making process as it helps to coagulate the proteins in the milk, leading to the formation of curds.
When the pH of the milk drops, the protein molecules begin to attract each other, resulting in the formation of a network of curds. This process is essential for achieving the desired texture and consistency of the cheese.
Benefits Of Using Lemon Juice Over Rennet
Using lemon juice as a coagulant for cheese-making offers several benefits over traditional rennet. Firstly, lemon juice is a natural and readily available ingredient, making it a convenient option for home cheese makers.
Additionally, lemon juice imparts a subtle citrus flavor to the cheese, adding a unique twist to the final product. Moreover, for individuals with dietary restrictions or preferences, such as vegetarians, using lemon juice provides a suitable alternative to animal-based rennet.
By leveraging the natural acidity of lemon juice, individuals can create their own unique cheeses at home without the need for specialized equipment or ingredients.
Whether you are a novice cheese maker or a seasoned enthusiast, the simplicity and versatility of using milk and lemon juice for cheese making make it an enjoyable and rewarding culinary endeavor.

Gathering Your Supplies
List Of Essential Cheese-making Tools
Before you start making cheese from milk and lemon juice, it’s important to ensure that you have all the essential tools for the process. Here’s a list of the key items you’ll need:
- Cheese cloth
- Stainless steel pot
- Colander
- Thermometer
- Slotted spoon
- Measuring cups and spoons
Selecting The Best Type Of Milk For Cheese
The type of milk you use is crucial to the success of your cheese-making process. Opt for fresh, high-quality whole milk from a trusted source. It’s important that the milk is not ultra-pasteurized as this can affect the curdling process. Look for milk that is free from additives and has not been homogenized for the best results.
Prepping Milk And Acid
Making cheese from milk and lemon juice is a simple and rewarding process. Preparing the milk and acid mixture is the first step in this cheese-making adventure. Here’s how you can get started:
How To Correctly Heat Your Milk
Heating the milk to the right temperature is crucial in the cheese-making process. Follow these steps to ensure your milk is heated correctly:
- Pour the milk into a heavy-bottomed pan.
- Place the pan over low to medium heat.
- Stir the milk frequently to prevent it from scorching.
- Heat the milk to around 180°F (82°C), just below boiling.
Proportions For Lemon Juice To Milk
The right ratio of lemon juice to milk is essential for successful cheese-making. Here are the proportions to follow:
| Milk Quantity | Lemon Juice Quantity |
|---|---|
| 1 gallon | 1/4 to 1/2 cup |
| 1 liter | 2 to 4 tablespoons |

The Curdling Process
Making cheese from milk and lemon juice involves a fascinating chemical reaction known as the curdling process. This process transforms liquid milk into solid curds and a liquid called whey.
Lemon juice contains citric acid, which helps to lower the pH of the milk, leading to the coagulation of proteins and the separation of curds from the whey. Understanding the curdling process is essential for successfully crafting your homemade cheese.
Step-by-step Guide To Adding Lemon Juice
1. Heat the Milk: Pour the milk into a large pot and heat it over medium heat until it reaches around 185°F.
2. Add Lemon Juice: Once the milk reaches the desired temperature, slowly add the lemon juice while stirring gently. You’ll notice the milk beginning to curdle as the acidic lemon juice interacts with the proteins in the milk.
3. Stirring Continuously: After adding the lemon juice, continue stirring the mixture gently for a couple of minutes to ensure the lemon juice is evenly distributed throughout the milk.
4. Rest the Mixture: Allow the mixture to rest for about 10 minutes to fully curdle.
Signs Of Proper Milk Curdling
Texture Change: The milk will separate into solid white curds and a yellowish-green liquid known as whey. The curds should be firm and distinct from the whey.
Clear Whey: When the milk has properly curdled, the whey will appear clear rather than cloudy, indicating successful separation of solid curds. If the whey remains cloudy, additional lemon juice may be needed.
Clean Break: If you insert a knife into the curds and it creates a clear separation or “clean break,” the curdling process has been successful.
Draining The Curds
After the curds have formed, the next step in making cheese from milk and lemon juice is draining the curds. This critical step involves separating the solid curds from the liquid whey to achieve the desired cheese texture. Proper techniques for straining the curds from whey and essential tips for achieving the desired cheese texture are crucial to the cheese-making process.
Techniques For Straining Curds From Whey
There are several effective techniques for straining curds from whey, each offering its own advantages. Whether using a cheesecloth, muslin cloth, fine mesh strainer, or a cheese mold, the goal is to effectively drain the curds without losing valuable texture and flavor.
Tips For Achieving Desired Cheese Texture
When draining the curds, it’s essential to pay attention to key factors that contribute to achieving the desired cheese texture. Time and pressure play crucial roles in forming the cheese’s texture, along with the level of moisture retained in the curds.
Additionally, maintaining proper temperature and ensuring consistent stirring are essential for achieving the desired cheese texture.
Molding And Pressing Cheese
After the cheese curds have been formed, the next step is to mold and press the cheese. These crucial processes are responsible for giving the cheese its distinct texture and flavor.
Proper molding and pressing ensure that the cheese develops the desired consistency and form. Let’s delve into the details of shaping your cheese curds and pressing for consistency and form.
Shaping Your Cheese Curds
Once the cheese curds have reached the desired acidity and texture, it’s time to shape them into the desired form. This can be done by placing the cheese curds into a mold. Use a cheese mold that allows excess whey to drain out and helps the curds retain their shape.
Press the curds firmly into the mold, ensuring an even distribution to avoid air pockets. You can experiment with different molds to achieve various shapes and sizes for your cheese.
Pressing For Consistency And Form
After molding the cheese, the next step is pressing. This step is crucial in removing excess whey and ensuring the cheese develops the desired texture. Use a cheese press to apply gentle, steady pressure to expel the remaining whey and consolidate the curds into a solid mass.
The pressing time and pressure will vary based on the type of cheese being made. This process ultimately shapes the final product, giving it its characteristic texture and form.
Storing Your Homemade Cheese
When it comes to storing your homemade cheese, there are a few best practices to keep in mind to ensure the quality and flavor are maintained. Whether you’re making fresh cheese from milk and lemon juice or a more aged variety, proper storage is essential to preserving the taste and texture of your creation.
Best Practices For Cheese Storage
The way you store your homemade cheese can greatly impact its flavor and longevity. Here are some best practices to follow:
- Wrap the cheese tightly in wax paper or parchment paper to allow it to breathe while protecting it from excess moisture. Avoid using plastic wrap, as this can trap moisture and adversely affect the cheese.
- Place the wrapped cheese in an airtight container or resealable bag to further protect it from absorbing odors and flavors from the surrounding environment.
- Store the cheese in the refrigerator, ideally in the vegetable crisper drawer, where the temperature and humidity levels are more stable.
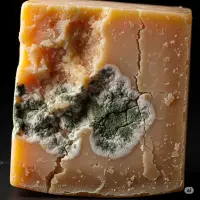
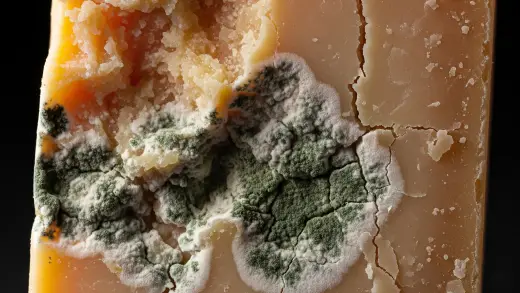
- Check the cheese periodically for any signs of mold or spoilage and promptly remove any affected areas before consuming.
How Long To Age Your Cheese For Optimal Taste
The aging process is crucial for developing the flavor and texture of your homemade cheese. Different types of cheese require varying aging times to achieve optimal taste:
| Cheese Type | Optimal Aging Time |
|---|---|
| Fresh cheese (e.g., paneer) | Best consumed within 3-5 days |
| Semi-soft cheese (e.g., mozzarella) | 1-2 weeks for mild flavor, up to 6 weeks for enhanced complexity |
| Hard cheese (e.g., cheddar) | 2-12 months for rich, mature flavors |
Frequently Asked Questions On How To Make Cheese From Milk And Lemon Juice
What Are The Main Ingredients For Making Cheese At Home?
You only need milk and lemon juice to make homemade cheese.
Can I Use Any Type Of Milk To Make Cheese?
Yes, you can use any type of milk to make cheese, including whole, skim, or low-fat milk.
How Long Does It Take To Make Cheese From Milk And Lemon Juice?
The process of making cheese from milk and lemon juice typically takes around 2-3 hours.
Is It Necessary To Use Lemon Juice To Make Cheese?
Yes, lemon juice is a crucial ingredient in making cheese from milk at home.
What Type Of Cheese Can Be Made From Milk And Lemon Juice?
You can make soft, crumbly cheese known as paneer using milk and lemon juice.
Can I Add Flavorings Or Seasonings To The Homemade Cheese?
Yes, after the cheese is formed, you can add seasonings or herbs for additional flavor.
Is Homemade Cheese From Milk And Lemon Juice Healthy?
Yes, homemade cheese from milk and lemon juice is a nutritious food option.
Can I Store Homemade Cheese And For How Long?
Store homemade cheese in an airtight container in the refrigerator for up to 5-7 days.
Are There Any Alternative Methods For Making Cheese At Home?
Yes, you can also make cheese using vinegar instead of lemon juice in the process.
Conclusion
Incorporating fresh ingredients to create homemade cheese is a delightful culinary adventure. With just milk and lemon juice, you can craft a delicious and healthy alternative to store-bought options. The simplicity of this process and the opportunity for customization make cheese-making an accessible and rewarding pursuit for any home cook.
Experimenting with flavors and textures can lead to a wide array of cheeses, perfectly tailored to your preferences. Whether you’re a novice or a seasoned chef, trying your hand at crafting cheese from milk and lemon juice offers a unique and fulfilling experience.
So, roll up your sleeves, grab your ingredients, and embark on your cheese-making journey with confidence and excitement!
Also, read on: How to Make Port Salut Cheese, How to Make Bocconcini Cheese at Home, How to Make Humboldt Fog Cheese, How to Make Ricotta Cheese Creamy for Lasagna, How to Make Cannoli Dip Without Ricotta Cheese and How to Make Fogo De Chao Grilled Cheese


